Did you know that search engines consider site speed to be one of the most important factors in search rankings. WP Super Cache is a great cache plugin that you can grab for free in the WordPress repository. In this article we will be covering the exact steps required on how to setup WP Super Cache on your website.
Before we get started, make sure to backup your website with a solution such as BlogVault, Updraft or Backup Buddy. I’ve put together a post that you may find helpful for backing up your website, check it out here.
Once you’ve backed up your website, you will need to download and activate the plugin from the WordPress repository. You should start by opening up your WordPress dashboard, hover your mouse over Plugins and click Add New. In the search box you will need to type in WP Super Cache for the plugin to appear, click on install then activate.
OK! So we’re good to go!
Let’s get started with the best settings for WP Super Cache
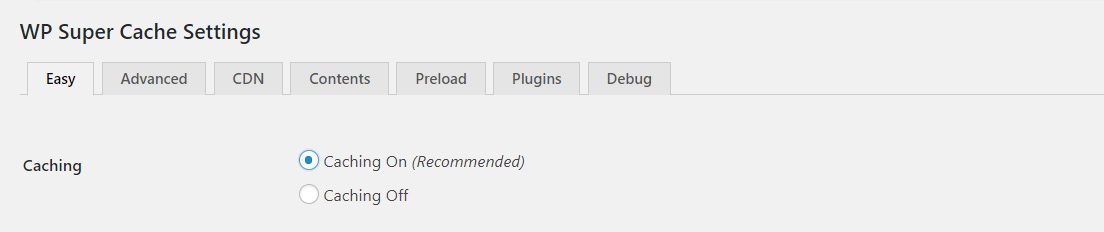
From the menu in the WordPress admin have a look for ‘Settings’, hover over this and click on ‘WP Super Cache’. This is where you will set up the plugin by configuring some basic settings.
Enable page caching to decrease the response time of the site, just click Caching on then Update Status.
Once you’ve enabled caching, click on the ‘Advanced’ tab.
Advanced settings – Step One
Enable the following options
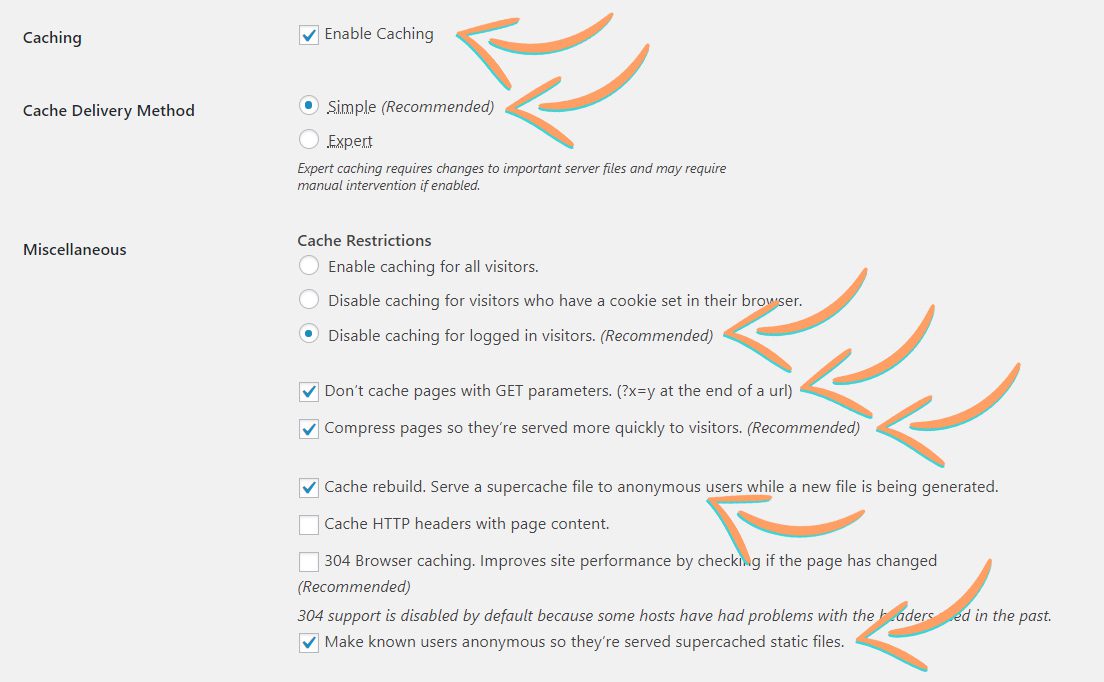
Caching
☑ Enable caching
Cache Delivery Method
☑ Simpole
Miscellaneous
☑ Disable caching for logged in visitors
☑ Don’t cache pages with GET parameters
☑ Compress pages so they’re served more quickly to visitors
☑ Cache rebuild. Serve a supercache file to anonymous users
☑ Make known users anonymous so they’re served suprcached static files
Advanced settings – Step Two
Enable the following options
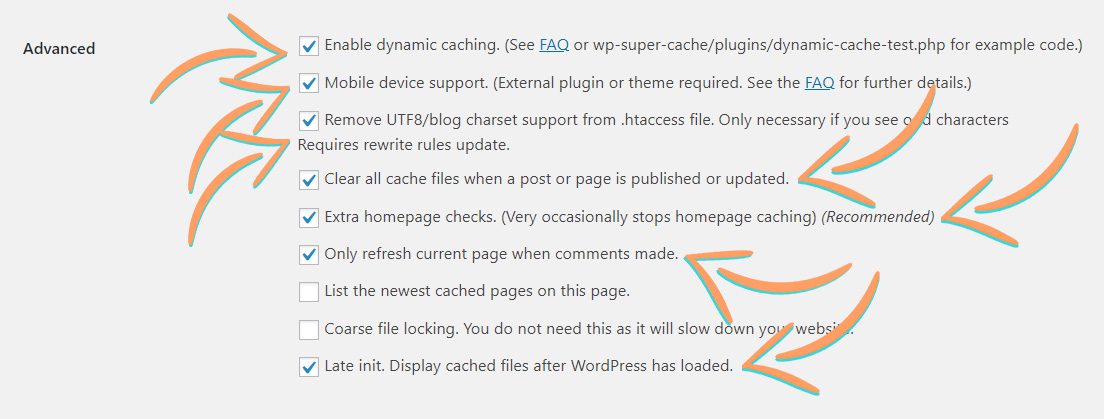
Advanced
☑ Enable dynamic caching
☑ Mobile device support
☑ Remove UTF8/blog charset support from .htaccess file
☑ Clear all cache files when a post or page is published or updated
☑ Extra homepage checks
☑ Only refresh current page when comments made
☑ Late init. Display cached files after WordPress had loaded
Once you have enabled the above options, simply click on Update Status and you’re almost ready to go.
Adjust your Preload settings
The last step in the setup process is to click on the Preload tab at the top of the page. Adjust your settings to match the following;
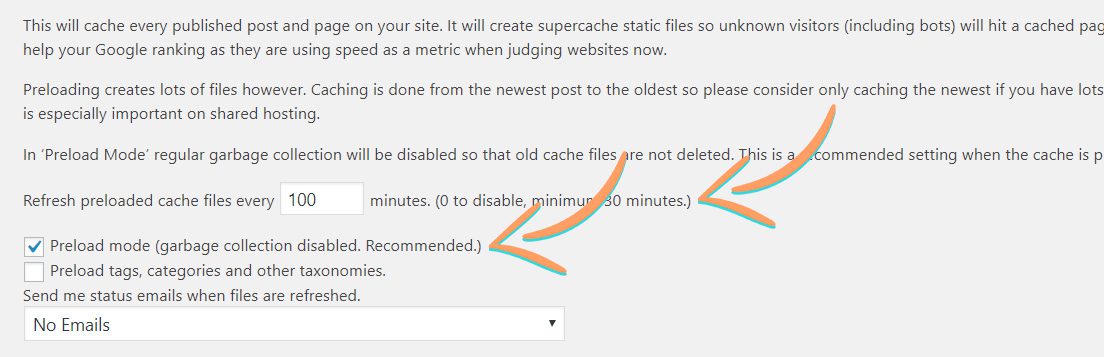
You need to remember and change the Refresh preloaded cache files every 100 minutes. Whilst your next in it, don’t forget to checked the option for Preload mode. Once you’ve done this, simply click on on Save Settings.
All done – go test your site!
Now that you’ve completed the setup of WP Super Cache, you will want to click on the Contents tab. Simply click on Delete Expired, once this has completed click on the Delete Cache button.
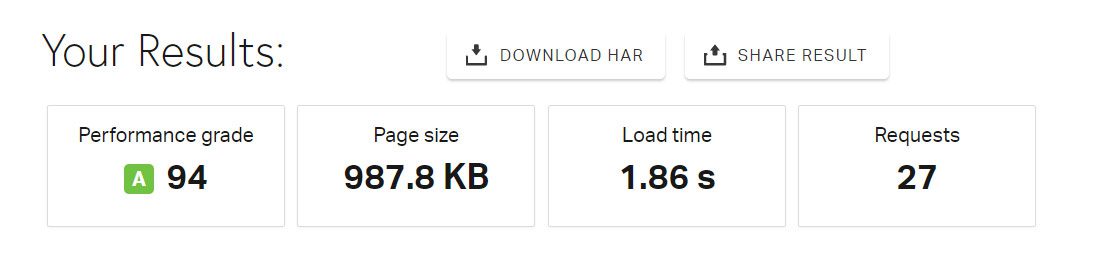
I would suggest that you head over to Pingdom and run a test on your website to see if the performance has improved.
Don’t forget to checkout my 10 ways to speed up your WordPress website.
If you have any questions or feedback on different variations to this setup, let me know in the comments below.