

Everyone wants a super fast website without compromising the design of the website they spent hours developing. In this article we will be covering the exact steps required on how to setup W3 Total Cache on your website.
Before we get started, make sure to backup your website with a solution such as BlogVault, Updraft or Backup Buddy. I’ve put together a post that you may find helpful for backing up your website, check it out here.
Once you’ve backed up your website, you will need to download and activate the plugin from the WordPress repository. You should start by opening up your WordPress dashboard, hover your mouse over Plugins and click Add New. In the search box you will need to type in W3 Total Cache for the plugin to appear, click on install then activate.
OK! So we’re good to go!
Let’s get started with the best settings for W3 Total Cache
From the menu in the WordPress admin have a look for ‘Performance’, hover over this and click on ‘General Settings’. This is where you will set up the plugin by configuring basic settings.
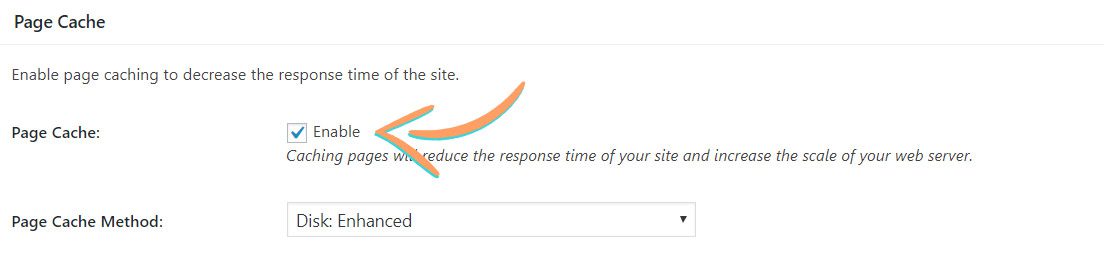
General Settings > Page Cache
Enable page caching to decrease the response time of the site.
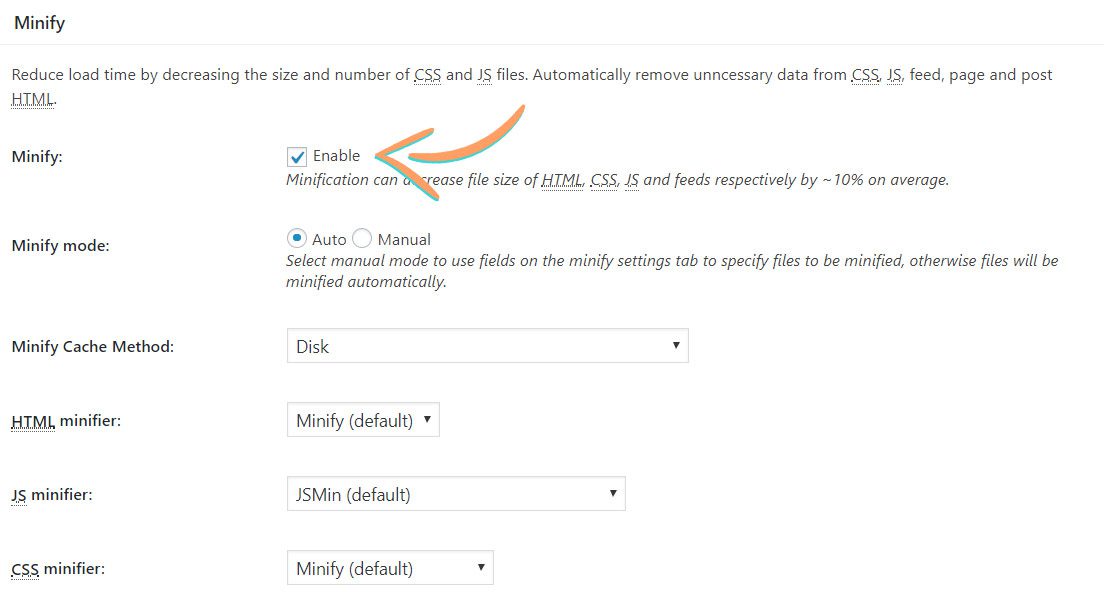
General Settings > Minify
Reduce load time by decreasing the size and number of CSS and JS files. Automatically remove unnecessary data from CSS, JS, feed, page and post HTML. You can actually leave this feature disabled if you want to setup Cloudflare on your website with W3 Total Cache using my tutorial as they cover this for you.
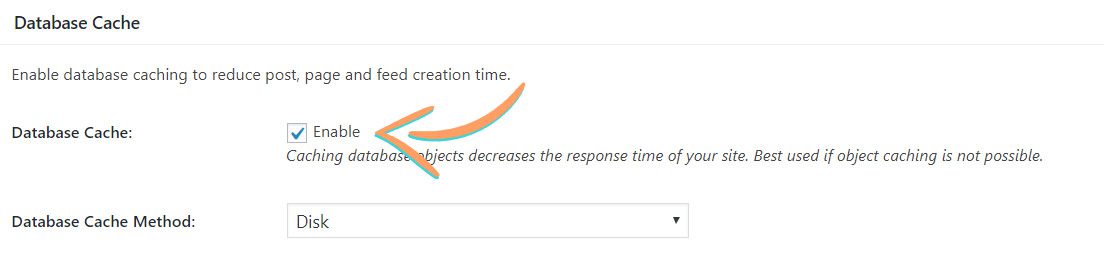
General Settings > Database Cache
Enable database caching to reduce post, page and feed creation time.
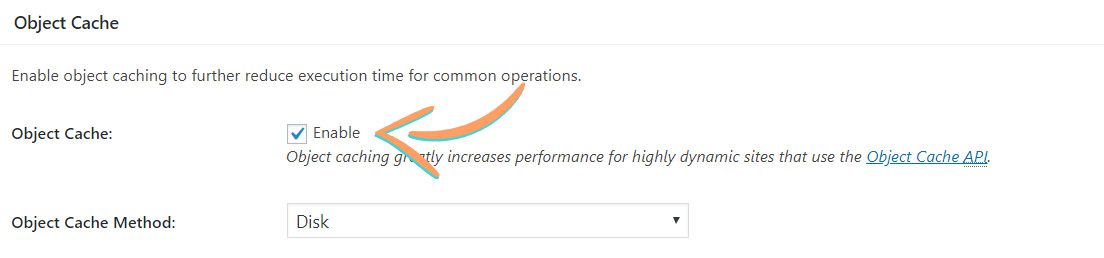
General Settings > Object Cache
Next, you should enable object caching to further reduce execution time for common operations.
General Settings > Browser Cache
Reduce server load and decrease response time by using the cache available in site visitor’s web browser.

Once you’ve enabled the above five settings on WP Total Cache, we can move on to tweaking each of the individual settings so make sure you click on save all settings.
Page Cache
From the menu click on Page Cache and enable the following features;
☑ Cache posts page
☑ Don’t cache front page
☑ Cache feeds: site, categories, tags, comments
☑ Cache 404 (not found) pages
☑ Don’t cache pages for logged in users
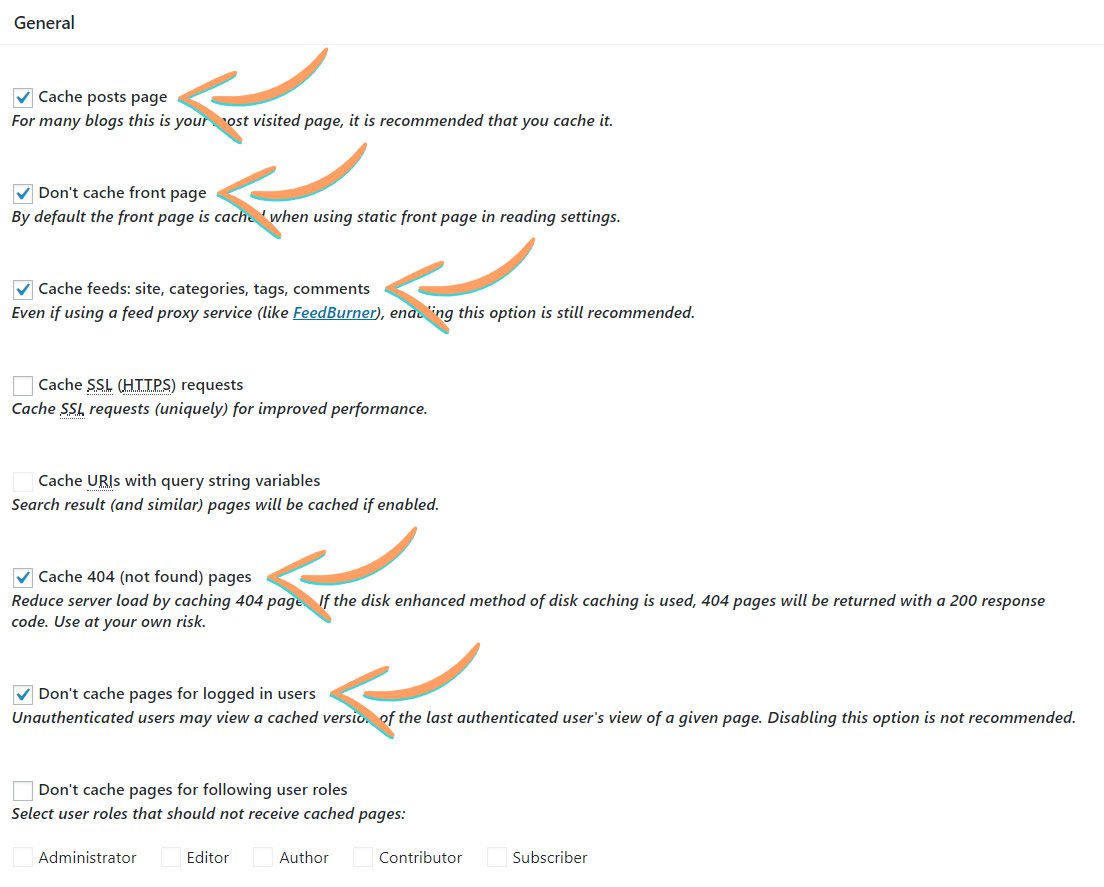
After you have enabled the above options, click on save all settings.
Minify
This option can sometimes break the way your website looks so you’ll want to double check it works fine, if it causes any problems jump back to the General Settings tab and deactivate Minify feature. You can contact your host or theme provider for their advice on which settings they would advise for minification.
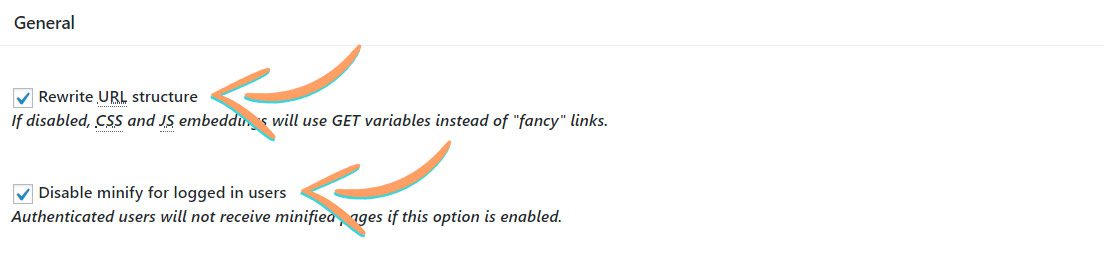
After you have checked the above two features, the other options listed below will be automatically set so you can click on save all settings and move on to the next step.
Browser Cache
From the menu click on Browser Cache and enable the following features;
- Set Last-Modified header
- Set expires header
- Set cache control header
- Set entity tag (ETag)
- Set W3 Total Cache header
- Enable HTTP (gzip) compression
- ☑ Don’t set cookies for static files
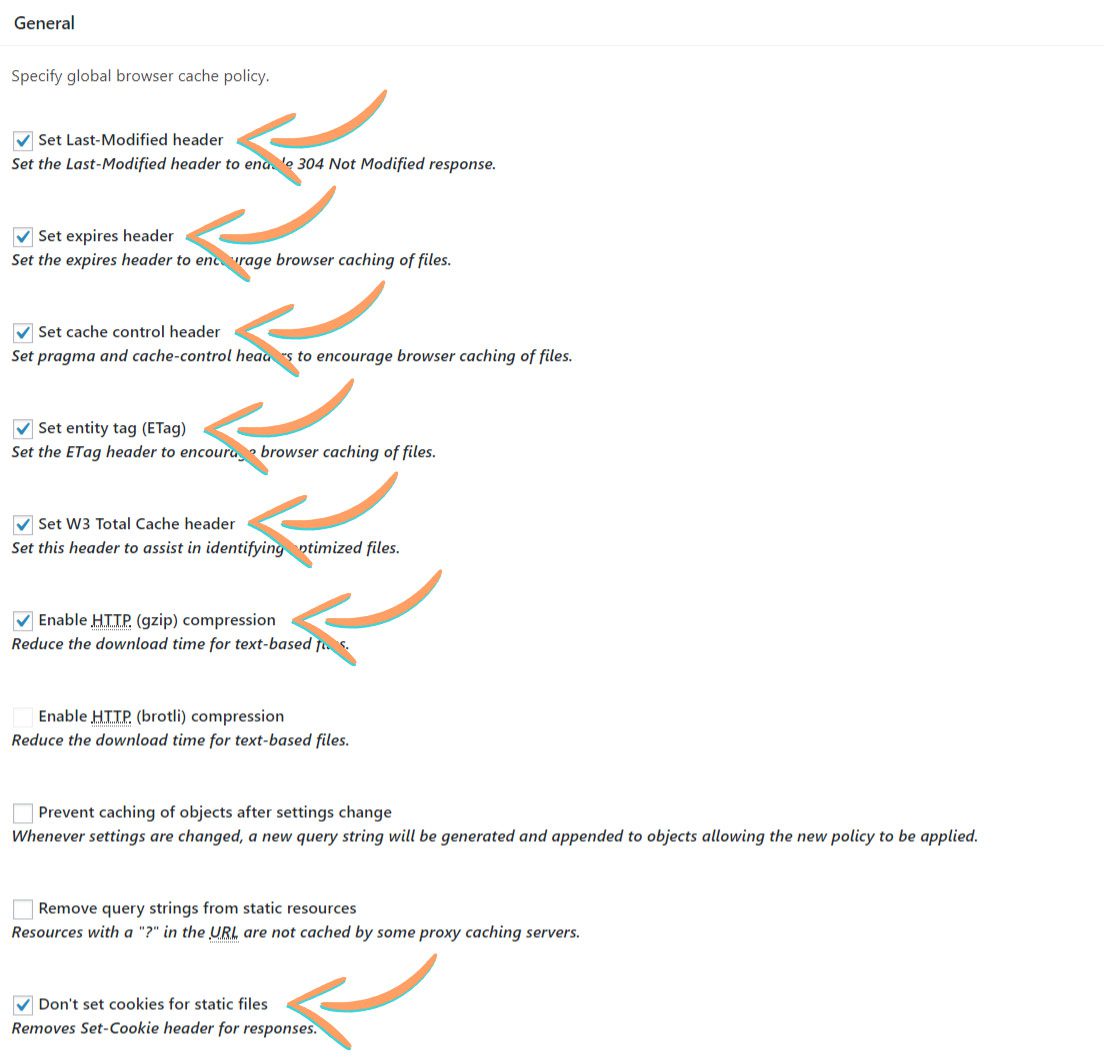
After you have enabled the above options, click on save all settings.
All done – go test your site!
Now that you’ve completed the setup of W3 Total Cache, you will want to click on Dashboard from Performance menu and then click empty all caches.
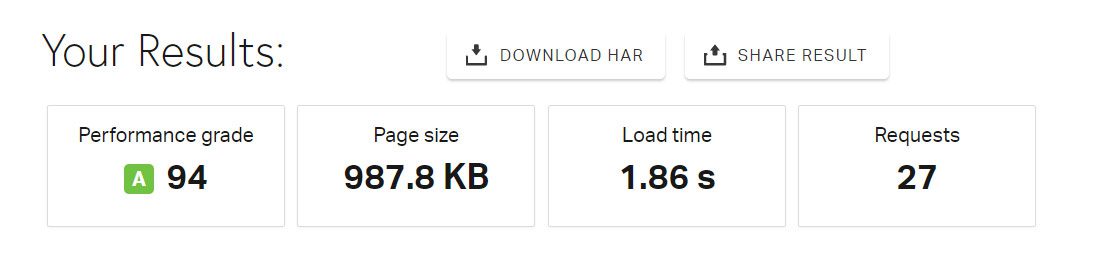
I would suggest that you head over to Pingdom and run a test on your website to see if the performance has improved.
Don’t forget to checkout my 10 ways to speed up your WordPress website.
If you have any questions or feedback on different variations to this setup, let me know in the comments below.